MNIST Digit Recognition Neural Network
A PyTorch neural network for handwritten digit recognition with 98.20% accuracy

Live demo of the digit recognition application
Project Overview
This project implements a neural network for recognizing handwritten digits using the MNIST dataset. The model achieves 98.20% accuracy on the test set and is deployed in a simple drawing application that allows users to draw digits and see real-time predictions.
The MNIST dataset is a large collection of handwritten digits that is commonly used for training various image processing systems. It's like the "Hello World" of machine learning - a perfect starting point for exploring neural networks and computer vision.
Neural Network Architecture
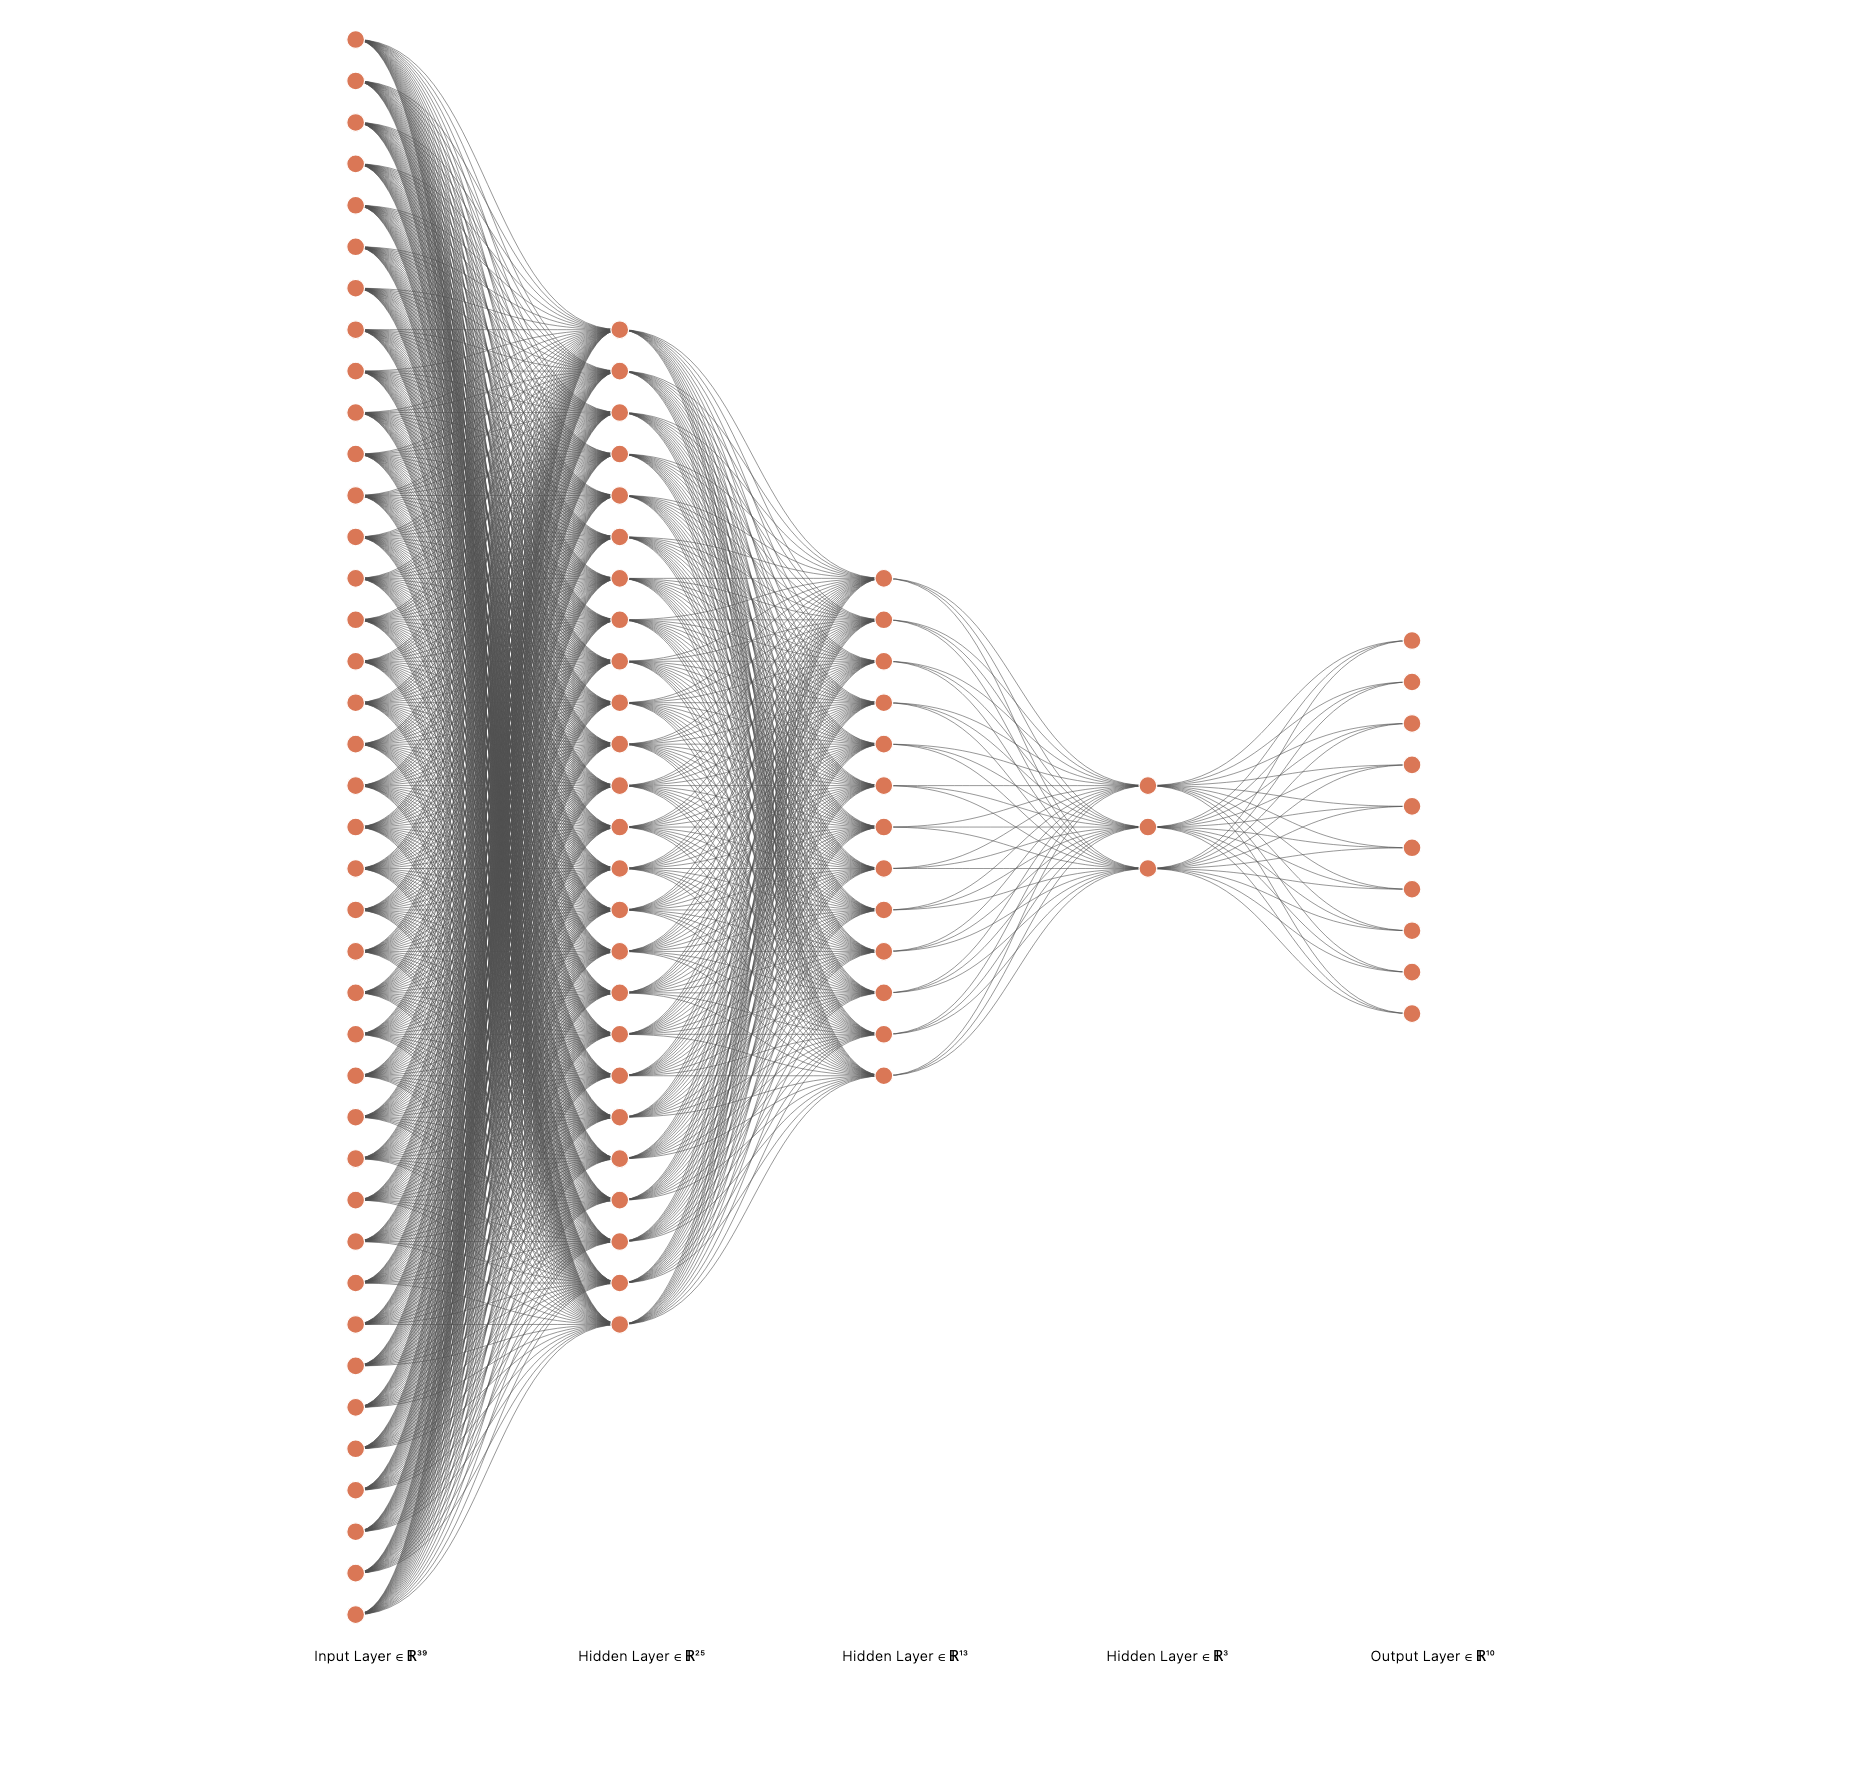
I designed a multi-layer neural network with carefully calibrated dropout to prevent overfitting:

Neural network architecture visualization (each node in the hidden layers represents approximately 20 neurons, while the output layer shows the actual 10 neurons)
The actual architecture consists of:
- Input Layer: 784 neurons (representing a flattened 28×28 pixel image)
- Hidden Layer 1: 512 neurons with ReLU activation and Dropout rate of 0.3
- Hidden Layer 2: 256 neurons with ReLU activation and Dropout rate of 0.2
- Hidden Layer 3: 128 neurons with ReLU activation and Dropout rate of 0.1
- Hidden Layer 4: 60 neurons with ReLU activation and Dropout rate of 0.05
- Output Layer: 10 neurons (one for each digit from 0-9)
For visualization purposes, I've simplified the representation by dividing the actual neuron count by 20 for the hidden layers, while preserving the actual count of 10 neurons in the output layer.
The architecture implementation in PyTorch:
Technologies & Libraries
This project leverages several powerful machine learning technologies:
- PyTorch: For creating and training the neural network model
- Torchvision: For accessing the MNIST dataset and transformations
- PIL (Python Imaging Library): For image manipulation in the drawing app
- Tkinter: For creating the interactive GUI application
- NumPy: For efficient numerical computations
- Matplotlib: For visualizing model performance and predictions
Training Process
The neural network was trained on the MNIST dataset with the following parameters:
- Training Epochs: 10
- Batch Size: 64
- Optimizer: Adam
- Learning Rate: 0.001
- Loss Function: Cross Entropy Loss
The training process involved:
Interactive User Interface
One of the most exciting aspects of this project is the interactive drawing application that allows users to test the model. The application is built with Tkinter and provides a simple canvas where users can draw digits and get real-time predictions from the trained model. The drawing application's user interface was developed with assistance from Claude 3.7 Sonnet.
Key features of the application include:
- Canvas for drawing digits with the mouse
- Real-time prediction of drawn digits
- Confidence score for predictions
- Clear button to reset the canvas
Key Learnings
Through this project, I gained valuable experience in:
- Neural Network Design: Understanding how layer sizes, activation functions, and dropout rates affect model performance
- PyTorch Workflows: Structuring ML projects using the PyTorch framework
- Regularization Techniques: Using dropout to prevent overfitting
- Image Processing: Converting user drawings to the format expected by the model
Challenges & Solutions
During this project, I encountered several challenges:
- Preventing Overfitting: Initial models achieved near-perfect accuracy on training data but performed poorly on test data. I solved this by implementing a progressive dropout strategy, with higher dropout rates in earlier layers.
- Balancing Model Complexity: Finding the right architecture that was complex enough to learn patterns but simple enough to generalize well required extensive experimentation.
- User Interface Design: Creating a responsive drawing interface that accurately captured user input required careful calibration of line widths and image processing steps.
- Model Deployment: Ensuring the trained model could be loaded correctly in the application required robust error handling and path management.
Future Improvements
This project could be extended in several ways:
- Implementing batch normalization to improve training stability
- Exploring convolutional neural networks (CNNs) for improved accuracy
- Adding data augmentation to improve model robustness
- Creating a web-based version of the application using Flask or Django
- Extending the model to recognize more than just digits (letters, symbols, etc.)
Acknowledgments
I'd like to acknowledge the following contributions to this project:
- Claude 3.7 Sonnet AI for assistance in developing the drawing application UI
- The PyTorch team for their excellent deep learning framework
- The creators of the MNIST dataset for providing a standardized benchmark for image recognition
Getting Started with This Project
If you're interested in trying out this project yourself:
Prerequisites
- Python 3.8+
- PyTorch
- NumPy
- Matplotlib
- PIL
- Tkinter (usually comes with Python)
Installation
Running the Application
Make sure the path to the model is correct for your system!
Conclusion
This MNIST digit recognition project demonstrates the power of neural networks for image recognition tasks. By achieving 98.20% accuracy with a relatively simple architecture, it shows how effective modern deep learning techniques can be, even without the complexity of convolutional networks.
The interactive drawing application brings the neural network to life, allowing users to experience AI in action as it recognizes their handwritten digits in real-time. This combination of backend ML engineering and frontend user experience design makes for a compelling demonstration of applied machine learning.
